

Setting Up Icarus Verilog on Google Colab
Google Colab is a cloud-based platform that allows you to run code in a Jupyter Notebook environment. While it’s primarily designed for Python, it can also be adapted to run Verilog simulations using Icarus Verilog. This guide walks you through setting up Icarus Verilog on Colab, writing and compiling Verilog code, running simulations, and generating waveform files for debugging—all in the cloud.
You might wonder why we’d even consider simulating Verilog code on Colab when there are many industry-grade tools available that offer synthesis, timing analysis, and complete hardware design capabilities. The answer lies in accessibility. Icarus Verilog is an open-source, lightweight alternative that remains incredibly relevant—especially for students, educators, and hobbyists. It’s perfect for academic projects, quick prototyping, and learning digital design fundamentals without the overhead of licensed tools or heavy installations.
One major advantage of using Colab is its seamless integration with the web—allowing you to import datasets or files directly from URLs or cloud storage. This becomes particularly useful for projects where Verilog testbenches need structured data, such as input vectors, weights, or test cases. With Python handling the preprocessing and formatting, you can easily generate files that your Verilog code can read, enabling a smooth and flexible software-hardware co-design workflow.
My own journey into this setup began with a somewhat unconventional idea: training a neural network in Verilog. It was a fun and technically challenging experiment that led me to build this workflow on Colab. If you’re curious to see how that turned out, feel free to check out my project here.
Why Use Icarus Verilog on Google Colab?
Icarus Verilog is an open-source Verilog simulation and synthesis tool that supports a wide range of Verilog constructs. Running it on Google Colab offers several advantages:
- No need to install software on your local machine.
- Easy collaboration and sharing through Colab notebooks.
- Accessible from any device with an internet connection.
- Free computational resources provided by Google.
Now, let’s get started with setting up Icarus Verilog on Google Colab.
Installing Icarus Verilog
Before you can run Verilog simulations, you need to install Icarus Verilog on your Colab environment. To do this, execute the following commands:
!sudo apt-get update
!sudo apt-get install -y iverilog
Once installed, verify the installation by checking the version:
!iverilog -v
If the installation is successful, you will see the version information displayed in the output.
Writing and Running a Simple Verilog Program
To test if Icarus Verilog is working correctly, let’s write a simple Verilog program that prints a message. In Colab, you can use the %%writefile magic command to create and save Verilog files:
%%writefile test.v
module hello;
  initial begin
    $display("Hello, Icarus Verilog on Colab!");
    $finish;
  end
endmodule
Compiling and Running the Verilog Code
Once the Verilog file is created, compile it using iverilog:
!iverilog -o test.out test.v
Now, run the compiled Verilog file using vvp:
!vvp test.out
If everything is working correctly, you should see the message “Hello, Icarus Verilog on Colab!” printed in the output.
Generating and Viewing Waveform Files
In addition to printing messages, you can also generate waveform files to analyze signal behavior. This is particularly useful for debugging digital designs.
To generate a VCD (Value Change Dump) file, modify your Verilog code to include the necessary $dumpfile and $dumpvars commands:
%%writefile wave.v
module wave;
  initial begin
    $dumpfile("wave.vcd");
    $dumpvars(0, wave);
    $display("Generating wave.vcd...");
    #10;
    $finish;
  end
endmodule
Compiling and Simulating
Compile and simulate the modified Verilog file using the following commands:
!iverilog -o wave.out wave.v
!vvp wave.out
You should see a message confirming that wave.vcd has been generated.
Downloading and Viewing the Waveform File
Once the wave.vcd file is created, you can download it to your local machine for analysis using GTKWave, a popular waveform viewer. Use the following command to download the file:
from google.colab import files
files.download("wave.vcd")
After downloading, open the file in GTKWave and inspect the signal transitions.
Download the Notebook
You can download the Jupyter Notebook containing all the above steps from the following link:
Conclusion
Using Google Colab for Icarus Verilog simulations provides a simple and convenient way to write, compile, and debug Verilog code without requiring any local installations. Whether you’re a beginner learning Verilog or an experienced engineer testing small designs, this setup allows you to quickly prototype and verify your digital circuits.
By following the steps outlined in this guide, you can:
- Install Icarus Verilog in Google Colab.
- Write and execute Verilog programs.
- Generate and analyze waveform files.
What’s more—Colab isn’t just limited to Verilog. With a bit of setup, you can manage a range of open-source tools like Yosys, Graywolf, and many components from the OpenROAD flow, with GUIs disabled. This opens the door to enabling a full end-to-end digital design workflow—all within the cloud.
This setup is especially useful for students, researchers, and hobbyists looking for a hassle-free environment to explore digital design, without worrying about system configurations or heavy installations.
Happy coding!
Related Posts

Hello World!! (Why I Built This Blog)
Hello, and thank you for visiting. My name is Jagadeesh, and this blog is a personal and professional record of my journey through college, projects, and the experiences that continue to shape my interests and aspirations.
Read more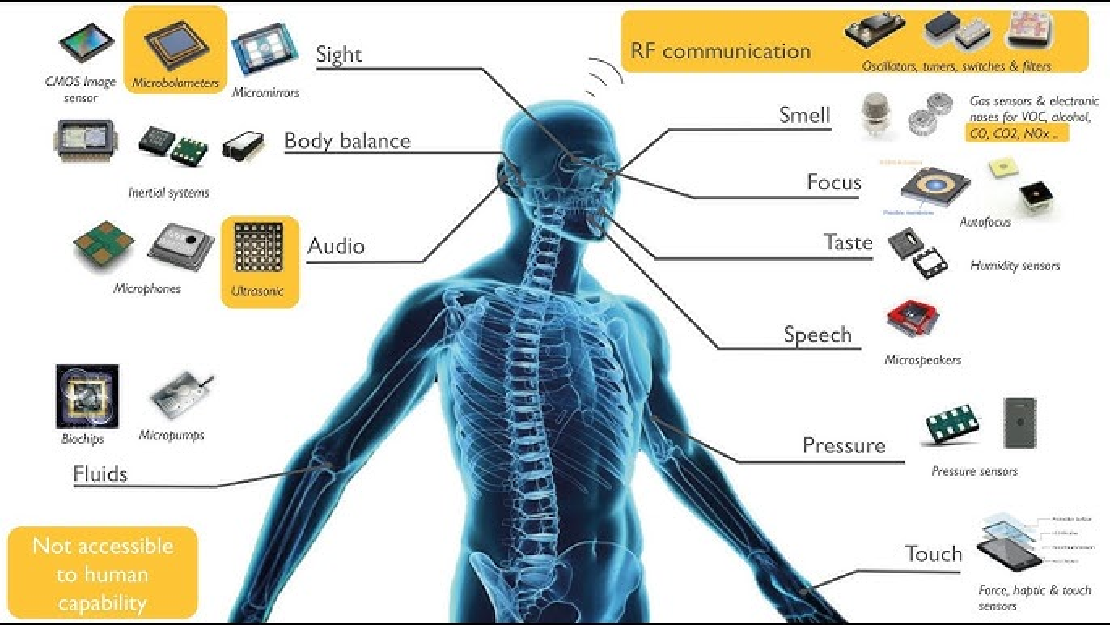
Sensors in Robotics: How Ultrasonic, LiDAR, and IMU Work
Sensors are to robots what eyes, ears, and skin are to humans—but with far fewer limits. While we rely on just five senses, robots can be equipped with many more, sensing distances, movement, vibrations, orientation, light intensity, and even chemical properties. These sensors form the bridge between the digital intelligence of a robot and the physical world it operates in.
Read more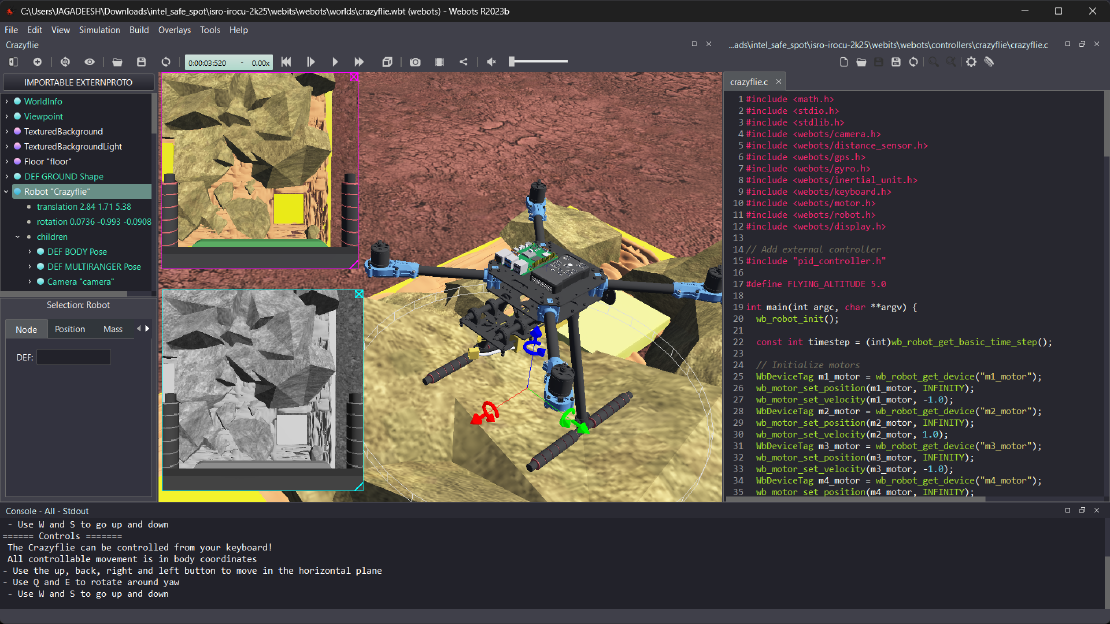
Debugging a Robot In Simulation Before You Burn Wires
Hardware does not come with an undo button. Once you power it on, mistakes—from reversed wiring to faulty code—can result in costly damage. Motors may overheat, printed circuit boards (PCBs) can be fried, and sensors may break. These issues turn exciting projects into frustrating repair sessions. The autonomous drone shown above, designed for GNSS-denied environments in webots as part of the ISRO Robotics Challenge, is a perfect example—where careful planning, testing, and hardware safety were critical at every step
Read more